Crafting for Mickey: Custom Stencil Shirts

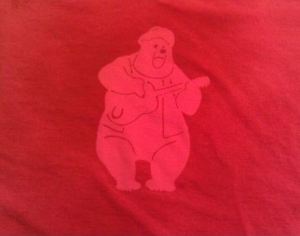
Finished stenciled shirt

Finished stenciled shirt

I’ve posted one way to make your own custom t-shirts for your Disney trip using an iron-on technique, but today, I’d like to talk about using a stencil technique to craft your own shirts.

Materials:
plain t-shirt
transparency paper
fabric paint
image of your stencil subject
spray adhesive
sharp scissors (4″ embroidery scissors work very well)
dropcloth

If you will hand-draw your stencil, you’ll also need:
permanent marker with a fine point

If you will use a computer to create your stencil, you’ll also need:
computer with graphics program like Gimp or Photoshop
printer

Notes on materials:
Transparency paper: You can find this online or in office supply stores, but it tends to come in boxes in a much larger quantity than you’ll need. I called a few print and copy places and found one that was willing to sell transparency paper to me by the sheet. If you are hoping to print your stencil lines directly onto the transparency paper, make sure to get the type of transparency paper that matches your printer. (You can’t print onto laser printer transparency paper with an inkjet printer, it won’t set and will smudge as you try to work with it.) If you can’t find matching paper, don’t worry, there’s a workaround for that.

Fabric paint: I found this works best with fabric spray paint. Make sure you read the instructions, and I recommend practicing your first spray on a scrap piece of fabric to get your technique down. Sometimes the spray isn’t uniform right after you press the trigger, so I had an old towel that I began the spray on, then I moved to the shirt once it evened out.

Scissors: Small scissors will work best, and you’ll also need a nice, sharp point. You’ll need to get into a lot of small, internal cuts and small, sharp scissors are the best way to do it.

Dropcloth: No need to get fancy. I just used a large garbage bag as my dropcloth.

Steps:
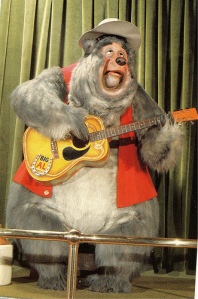
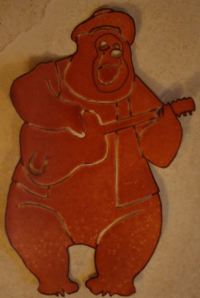
1. I started with an image of Big Al from the Country Bear Jamboree for my shirt, as I never have and probably never will see him on an officially-licensed shirt. Here’s the image I chose:

Original Big Al Image

Original Big Al Image

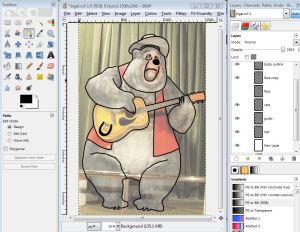
2. I used the free, open-source graphics program Gimp to make the outlines for the stencil. The best way to make the lines is probably to use the Path tool. Create a new layer (Layer menu->New Layer) for your stencil lines, so you keep your original image layer clean. I created multiple layers for my stencil lines as I worked so that I could decide later to eliminate some lines from the design if I wanted to. When you are creating stencil lines, you are trying to make a very basic outline of the subject (you don’t want too many lines) but it has to be enough detail so that the subject will be clear on the final product.

To use the Path tool to make the lines, simply create the path by selected waypoints along the outline you’re making, then click the “Stroke Path” button on the Paths area in the palette.

Gimp window, showing stroked path lines for stencil

Gimp window, showing stroked path lines for stencil

If you are using a permanent marker to make your stencil lines, simply place a piece of transparency paper over your image at this step and carefully outline the important, defining lines of the image. Then skip to step 5.

3. If you can print directly onto your transparency paper (this will depend on what kind of printer you have and what transparency paper you were able to find) then print only your stencil line layers (not your background image) onto a piece of your transparency paper. If your paper and printer type don’t match, just print the lines on a piece of regular printer paper.

(To get only your stencil lines, click the eye next to the background image layer in the layer tool window, which you can bring up in Gimp under Windows->Dockable Dialogs->Layers.)

4. If you had to print to regular printer paper, use some of your spray adhesive on the back of your transparency paper and stick your printout to your transparency paper. If not, skip to step 5.

5. Cut around the outline of your stencil. Then, using the internal lines you made, carefully cut along those lines to expose the inner detail in your stencil. Do not cut your internal lines all the way to the edge, leave a centimeter or two between the end of your internal lines and the outer edge of your stencil. (See below.)

Stencil

Image shown is of the post-spray stencil, because you can see the internal lines more clearly. Note how they stop before reaching the edge.

If you had to print your stencil lines to a sheet of regular paper, you should now peel the paper off the back of your stencil, doing so very carefully so that you don’t rip the transparency paper.

6. When your stencil cutting is done, use some spray adhesive on the back and stick it to your shirt. Make sure to position it carefully so that the image will fall on the right part of the shirt. You may want to use another shirt you own with a design on it for placement reference.

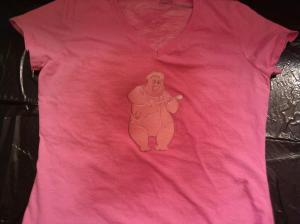
Shirt and stencil, post-spray

Shirt and stencil, post-spray

7. Place the shirt on your dropcloth and smooth out all the wrinkles. Prepare your fabric paint according to package instructions. Spray over your stencil with your fabric paint.

8. Let the paint dry according to the package instructions. Remove the stencil after the paint is dry. Consult the package instructions for laundering guidelines.

9. Wear your new shirt with pride!

Posted in Crafting for Mickey, Tips | Tagged , , , , , | 3 Comments

New Fantasyland Dress Rehearsal: Mermaids, Belle, and LeFou’s Brew, Oh My

New Fantasyland Dress Rehearsal

New Fantasyland Dress Rehearsal

I admit it, being a local makes you a huge chicken over two things: dense crowds and touring in the rain. I don’t absolutely avoid either, of course (we would have missed the parks over the entire summer, if that were the case) but we try to limit exposure as much as it’s possible. With that in mind, I was hoping that dress rehearsals for this next phase of New Fantasyland would continue today, Sunday, October 14, after a lot of Disney blogs reported yesterday of nearly everything being open. As there was a Mickey’s Not So Scary Halloween party tonight, I hoped that the park’s early 7:00 pm closure would limit crowds hoping to see all the new, shiny things at the back of the park.

On the whole, I’d say the crowds back there were not nearly as thick as they really could have been. Maybe everyone piled over there yesterday, maybe a lot of people aren’t that excited about running over there at the first chance, or maybe Magic Kingdom was indeed less trafficked because of the MNSSHP. For whatever reason, waits weren’t insane and it wasn’t shoulder-to-shoulder park guests back there today, which let us get a look at nearly everything. Reading further will give you pictures and spoilers, so if you wish to keep the area a surprise for your next trip, stop reading now.

When we got to the park, we headed first to get fastpasses for Journey of the Little Mermaid (currently available in front of Mickey’s Philharmagic, where Dumbo fastpasses were before they were relocated to Storybook Circus) and they were available without too much lead time before they matured. Standby waits at the attraction were never long while we were there this afternoon. A lot of this is due to its crowd-friendly continuous loader setup, which really moves the guests through at a rapid rate.

We had a short wait before our fastpasses were ready to go, so we spent some time just enjoying the common areas and theming.

Waterfall in New Fantasyland

Waterfall in New Fantasyland

See more pictures of the common areas in New Fantasyland here.

These guys line the bridge leading to Be Our Guest

These guys line the bridge leading to Be Our Guest

We were able to get a peek inside some of the Be Our Guest restaurant (not open for food, just for looking around). The bridge leading to the restaurant is striking, really setting the mood with gargoyle-like grotesque statues lining the way. The stained glass detail over the doorway is a foreshadowing of the large, stunning Belle and Beast stained glass panel just inside  restaurant and to the left. (Will this, perhaps, be the backdrop for a table service photo-op?) On the immediate right, the suits of armor hallway leads to what must be the counter service/lunch area of the restaurant. Kiosks were visible from behind the rope and you could just make out menu items on the screens, so clearly we’ll have self-order stations like the kiosks at Pecos Bill’s. We were also able to look at the ballroom-themed seating area for the table service side of the restaurant. It looks great, though it also looks like a lot of tables in a large, open room. I can’t see how this won’t get really loud when it is filled with excited park guests having dinner there, as there’s nothing in the room like dividers or half walls to absorb any of the sound. You can see more photos taken in and around Be Our Guest here, including the beautiful stained glass window.

With just a few minutes before we could use our fastpasses, we poked our heads inside Bonjour Gifts. It isn’t a huge shop, but there are a lot of items inside, many of which are either unique to the shop or at least very relevant to the surroundings. The upper walls are lined with more subtle theming that ties it in with the rest of the area.

Gaston's Fountain in the square

Gaston’s Fountain in the square

This area (near Gaston’s Tavern and Bonjour Gifts) also hosts Gaston’s fountain, and it is often home to Gaston himself as well. His meet and greet, at least at the moment, is sometimes a traditional “character stands in one place, people wait in a line looked after by a cast member, and a PhotoPass photographer is there to take pictures” meet and greet, but Gaston also free-roams the village square from time to time. He is happy to sign autograph books (Gaston told my daughter, “Finally! Now your book will be worth something!” as he signed hers) and pose for photographs, but you kind of have to mill around him and wait for him to pick you out of the crowd when he’s in wandering mode, which the character handler near him kept telling us was because “you can’t control Gaston when he’s decided he’s searching for Belle.” It is actually a nice change of pace for a meet and greet, but I can’t help thinking that people who feel passed over in the crowd will complain to Guest Services and Gaston’s wandering may vanish at some point in the future.

Journey of the Little Mermaid

Journey of the Little Mermaid

Our first ride on Journey of the Little Mermaid (hereafter, JotLM, because that’s exhausting to type) was pretty much a walk on through the fastpass line. The group who got merged in after us came out of the standby line, though, and I asked one of them how long they’d waited. They had walked nearly all the way through the standby queue, stopping only a couple of times, very briefly. I really like how efficient Disney’s modern continuous loaders are at moving guests through the ride, and this ride certainly fits that bill.

As for the ride itself, it’s quite charming with several very nice effects. There is a water effect as you “go under the water” at the beginning of the ride that is very well done. The animatronics do a good job of contributing to the telling of the story (though Sebastian’s eyes glow a little too brightly in some scenes) and it’s an enjoyable trip through some lovely scenes and some even lovelier air conditioning. We did take a second ride going through the standby queue with a very short wait, and I was actually a little sad to walk through the line so quickly and miss some of the details in the queue surroundings. (I’m sure I’ll get to study them next July when the crowds are larger, though, so there’s that to look forward to.) I highly recommend it to you on your next trip, especially if you’re already in the area. Here’s a link to my other photos in and around JotLM.

Before we move on, though, I need to know if I’m crazy here, or if these guys (below) are intentional nods to Epcot’s Figment.

Figment Fish?

Figment Fish?

We did not get back to meet Ariel in her new surroundings and back in her tail, though the waits we saw posted weren’t terrible. Around 11:00 am, the wait time sign was at 20 minutes, and it was at 30 minutes when we left around 2:00 pm. Considering the wait times Ariel and Prince Eric used to command at the Adventureland Veranda, those aren’t outrageous waits at all, really.

LeFeu's Brew info sign

LeFeu’s Brew info sign

As for Gaston’s Tavern, which is currently the only source of food in the area other than the popcorn/ice cream cart near JotLM, it is clearly meant only as a secondary food location. Other than the pork shank, every other item on the menu is a snack, like chips and hummus or apple slices with caramel dip. We tried the pork shank (tasty, but heavy on the pepper and very greasy) and we also split a LeFeu’s Brew, which is a frozen concoction that is a gold-ish color with a foamy topping. If you’ve seen a frozen Butterbeer from Universal’s Wizarding World of Harry Potter, it’s very similar to that (which I can’t think is a coincidence). It is mostly an apple base with a fruity foam (mango/passionfruit) and a “hint of marshmallow” according to the signage. The taste is difficult to describe. I can pick out all of those flavors in the drink except for the  marshmallow flavor, which I couldn’t really get a sense of. It’s not bad, especially if you like apple juice, but I’m not sure it’s super-awesome-great, either, and at $4.50 on its own or $10 with a souvenir (plastic) mug, I’m not sure how many more are in my future.

Enchanted Tales with Belle attraction sign

Enchanted Tales with Belle attraction sign

We also went to Enchanted Tales with Belle, where the queue stayed steady at around 45 minutes for the three or so hours we were there. The wait is less comfortable than many other next-gen queues being built around the parks, with more than half of your likely wait being completely uncovered. Even at today’s 80-85ish temperatures, we felt a little baked out there in the sun until we reached the shorter section near the end of the queue with overhead coverings. There is the exterior of Maurice’s cottage to admire before you reach the indoor section, which offers a lot of detail and things to see, but it’s tough to really enjoy it in mid-day Florida sun. I recommend seeing this attraction either right when it opens (if you can get into a short early day queue for it) or sometime other than the 12pm-3pm timeframe when the sun is at its least forgiving.

Magic Mirror

Magic Mirror

Once inside and on our trip back to the day Belle and the Beast fell in love, I have nothing less than praise for the theming and detail. The effects (there’s a magic mirror effect and two very well done animatronic characters) are examples of Imagineering’s best work. When it came time to pick people to play characters in the retelling of Belle’s story, however, we started to run into problems. Suddenly, all the children who’d been animated and lively during our wait (including mine!) turned into shrinking violets who were too shy to imagine taking part in the story. Our session had characters populated mostly by adults, though a few children were talked into participating when a parent offered to stand with them. Thankfully, the adults who were pressed into service (including me, I was a laughing portrait) got through the story with smiles on our faces and Belle acted suitably impressed.

At the end of the story, everyone who played a character was introduced to Belle as “Lord (name)” or “Lady (name)” and given a special bookmark, and we all had a little photo op moment with Belle. Many of you have probably read elsewhere that those who did not have a role in the story do not get a photo and moment with Belle, and that was true in our group today. There were no autographs (no one asked, but I can’t really see where you’d have an opportunity to ask the way things are set up) and also, the cast members did not pass out the special bookmark doodads to anyone not participating. With waits already in the 45 minute range for a relatively low crowd level season, I’m not sure I’m excited at the possibility that a lot of complaints lead to changes in the setup where everyone who wishes to get a photo with Belle is given time to do so, which will push wait times up very quickly. I am sure that people will complain, though, and I’m interested to see what the reaction will be and if any changes will be made after the attraction has been open for awhile. You can see more photos of Enchanted Tales with Belle, including some nice details from the walk through Maurice’s cottage, here.

That sums up our afternoon at the dress rehearsal pretty nicely. Are you excited to visit New Fantasyland on your next trip?

Posted in Magic Kingdom, News | Tagged , , , , , , , , , , , | Leave a comment

Crafting for Mickey: Displaying Your Photos to Keep the Fun Alive at Home

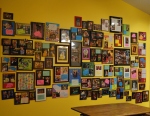
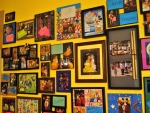
Are you a Disney fan with a large, empty wall in your house? Well, why not be crazy like me and turn it into a Disney wall?

There are many ways to bring a bit of the magic home with you, but the #1 souvenir most of us come home with are our photographs. Whether you buy a PhotoPass and let a Disney photographer do all the work or you take your own photos, you probably come home with hundreds of shots. There’s a lot of ways to enjoy them. You can scrapbook them or make photo books at sites like Shutterfly or Snapfish, you can buy a digital photo frame look at them there, you can upload them to photo sharing sites like Flickr, or you can simply store the files on your computer and look at them when you need a fix.

My favorite thing to do, though, is let them take over an entire wall of my house. Oh, it started small at first. After the first trip we made with our daughter in 2009, I put up a few pictures and a collage frame on a large, empty wall in our Colorado house. Then I’d see some great Disney scrapbook paper while browsing at craft stores like Michaels or Jo-Ann, and we’d end up with another frame up there. Then I’d find a great coupon for picture frames, or I’d see some used frames in good shape at a yard sale or the thrift store. Take a few more trips (and then move to Florida) and pretty soon you can hardly see the paint on the wall between the frames.

But seriously, this is such a fun thing to have in the house. We have a little breakfast table right in front of the wall, and when we have a meal there, we end up looking up at the pictures and talking about all the fun times we’ve had that are chronicled up on our wall.

A large number of the photos are of character meet and greets, but I try to include some other things we love about Disney, too. We have photos of some of our favorite places, some fun cast members we’ve met, and some of our on-ride photos, too. I try to mix it up as much as possible.

If this looks like fun to you, I have a few pieces of advice:

  • Sign up for coupons at your local craft stores and use them when you buy more frames or scrapbooking supplies for your wall. Michaels and Jo-Ann have some great coupons! Jo-Ann has a mobile app they regularly deliver high-value coupons to, so you don’t even have to clip the coupons or waste paper/ink printing them.
  • As I mentioned above, yard sales and thrift stores are great sources for inexpensive frames as well. Even scratched-up frames can usually be salvaged with a little creative use of wood filler and paint.
  • For a more uniform look, decide on a color for your frames (white or black would be easiest) and paint any frames you find that aren’t your chosen color. I really like the random pops of color from using different types and colors of frames, though.
  • Check the scrapbooking aisles for fun background papers and stickers you can use. (For longevity, make sure the stickers and paper you use are acid-free and of scrapbooking quality.) A lot of my frames are 8×10 or larger and there’s a lot of open space you have to fill in those!
  • I like the quality of photo prints from Shutterfly, an online photo and photo gifts service. Find a site or a local photo printer that does good work and then check for coupons or online coupon codes when you get prints made. (The website retailmenot.com is an excellent source of reliable coupon codes.)
  • Use shadow boxes to display some of your tangible souvenirs. We were so lucky to have a pair of JAMMitors drumsticks gifted to us after one of their performances, and they sit in a place of honor in a shadow box on our Disney wall. I wouldn’t enjoy them nearly as much if they were just secreted away in a drawer somewhere.
  • If you’re getting a lot of character autographs you plan to use on your Disney wall, you may benefit from putting together a simple, custom autograph book to use while you’re in the parks. I usually go to a print store, pick out some acid-free cardstock, have the shop cut it into quarters, and then ask them to spiral bind it. (See the photos in the gallery above of our current simple autograph book, which I had made for around $5 at our local Office Depot print shop.)

If you give it a shot, I’d love to see a photo of your Disney wall!

Posted in Crafting for Mickey | Tagged , , , , , | 3 Comments

Tips: Adults Doing “Kid Stuff”

Hang around the various Disney park fan forums long enough (though it won’t take long) and you’ll see a variant of the following question: “Is it okay if I, as a grown adult, do [something they think it just for kids] while I’m at Walt Disney World?” The question comes up a lot when it comes to meeting characters, or riding an attraction that appeals to very young children, like Dumbo.

Whenever this comes up, I think about some of the things Walt Disney said about his parks. Here’s one example on this Dream Builders sign I snapped a picture of the last time I was in the Magic Kingdom:

"It is my wish to delight all members of the family, young and old, parent and child."

Walt Disney quote

Another quote of Walt’s along this line of thinking: “You’re dead if you aim only for kids. Adults are only kids grown up, anyway.”

But neither of those are my favorite Walt Disney quote. My favorite is something he said in a television interview, when he was asked how he got the idea to develop Disneyland. He answered, “Well, it came about when my daughters were very young and Saturday was always Daddy’s day with the two daughters. So we’d start out and try to go someplace, you know, different things. I’d take them to the merry-go-round and I took them different places and I’d sit while they rode the merry-go-round. Sit on a bench, you know, eating peanuts. I felt that there should be something built where the parents and the children could have fun together. So that’s how Disneyland started.”

Walt’s viewpoint on his park starts to come into sharp relief when you really think about these quotes. What he wanted to create was a clean, safe place where anyone and everyone could come and have fun. I don’t think that he was picturing his guests worrying about what they were and weren’t “allowed” to enjoy. How are you having a good time if you’re worrying? I also don’t think he intended for some of his guests to look at other guests and judge them based on what they were choosing to enjoy. That just doesn’t seem Disney-like to me at all, certainly not a thought the man who sat on that bench eating peanuts and dreaming about a place where everyone could enjoy the attractions together would have had.

So, with the exceptions of children who don’t meet the height requirement for certain rides and also certain play areas with upper age limits (limits which are there for safety, not for “appropriateness”), I say you should plan and enjoy your vacation at Walt Disney World as you see fit. If you are a 29 or 39 or 49 year old person and you really love meeting Mickey or soaring around in your own Dumbo, go straight to the line and wait your turn. And conversely, if you are a harried parent waiting in a long line for your child to meet a princess and you’re tempted to wish the adults in line ahead of you left such experiences for the kids, remember that all guests are equal in the parks and we’re all welcome at its attractions.

Posted in Opinion, Tips | 1 Comment

Tips: Surviving the Rain at WDW

Rain is an unavoidable fact of life down here in Central Florida, and it causes a lot of people to head for the park exits. However, if you can stick it out and keep going, you’re going to find shorter lines at park attractions when the rain comes.

While there are many ways to deal with the rain if (when) it comes up during your time at Walt Disney World, I can tell you one thing: you will come through the situation better if you have given it some thought ahead of time and if you have prepared yourself with the tools you are most comfortable using.

Here’s a rundown of some of the strategies and items I’ve found most helpful in dealing with Florida’s liquid sunshine.

Ziploc bags/plastic shopping bags

These are actually some of the most useful items to have with you in the rain. They are great for keeping your portable electronics or souvenirs (like autograph books) dry, but they have many other uses as well. Once the rain stops, they’re great at segregating your wet items from your dry ones. Someone ended up with soaking wet socks that they wanted to take off? Pop them in a Ziploc to keep the water from getting all over your other things. It is so easy to pop a folded gallon bag or two in your pocket or at the bottom of your park bag when you’re heading out.

If you are really stuck and you don’t have anything with you, you can go to a WDW merchandise location and throw yourself on their mercy. They will oblige you with a plastic bag to help you out, but don’t take advantage of this (or they’ll eventually start telling everyone no!)

Ponchos

Walt Disney World sells adult and child sized ponchos in nearly every merchandise location throughout the parks and resorts. These are fairly reasonably priced (for a theme park, where prices for nearly everything are inflated) and are a good buy if you are at the parks in a downpour and you don’t have else anything with you to help you keep dry.

You can plan ahead before your trip and bring your own ponchos, of course. You can find very thin, single-use ponchos starting at about $1-$2 at dollar stores or discounters like Big Lots. You can also head out to your local sporting goods store to find thicker, more durable, re-usable ponchos. I have also found ponchos of this type in the accessories section of Target, where they also sell umbrellas. If you’re planning to tour through the rain, pick up a few of these before your trip and bring them with you. In their original packaging, they take up almost no room in your luggage or park bag, and they’re nice to have with you as an insurance policy.

If your rain strategy is primarily based on using ponchos, you’re going to want to move quickly once the rain hits. Wearing a poncho over already wet clothes is ridiculously unpleasant. If you are re-using ponchos, shake off some of the water (not onto other guests! I see this all the time!) and roll them up. Rolling them helps to keep the water from getting on the underside of the poncho. Put them in a Ziploc bag or a plastic shopping bag to keep the water away from your other items.

If you have trouble with the hood of your poncho not staying on your head, I have found that wearing a baseball cap under the poncho’s hood helps keep it in place.

Small umbrellas

You’ll also see some umbrellas come out when the rains hit. Compact umbrellas work best in the parks, since they are easy to carry when not in use and are small enough that you’re less likely to inconvenience your fellow guests around you by poking them with it. Watch out for wind gusts, though. You’re not going to float gracefully like Mary Poppins, you’re going to get blown around. Some storms at WDW are definitely not conductive to umbrella use.

Decide quickly what you’re doing and where you’re headed

Rain in Florida can be hard to read sometimes. A storm can look absolutely awful, dark skies, heavy rain, and high winds, and then be over in a half hour or less. It can also hang on for hours. Your best bet is to make a quick decision once the rain hits. The longer you stand around, the wetter you get and the more unpleasant your experience will be. Many indoor attractions also have indoor queues, and some of them are excellent places to hide out and wait out a rainstorm–if you are ahead of the crowd thinking the same thing. Head for something close by and get there quickly. Some lines get miserable and people get cranky in the rain. You want to be ahead of the fray. However…

Don’t queue for an attraction that will shut down if the rain gets heavy or if there’s lightning

There are some attractions that are bad choices as places to wait out the rain. Dumbo and the Dumbo-type rides tend to shut down in heavy rain, for example. (Many outdoor attractions are extremely unpleasant to ride during a heavy rain as well, even if they do keep operating.) If there’s lightning within a certain distance of WDW, some rides like Big Thunder Mountain Railroad and Splash Mountain shut down for safety reasons. Ask a cast member (there is always a cast member at the entrance to a queue) on your way into the ride if that attraction is likely to shut down due to the weather if you aren’t sure.

Clothing/footwear choices

If there’s rain in the forecast, keep this in mind when you’re getting dressed in the morning. If squishy, waterlogged socks and sneakers aren’t your thing, opt for sandals. Many varieties of sandals dry quickly once the rain passes, and your feet will also dry off faster. If you are strictly a sock and sneaker sort of person, do yourself a favor and bring a change of socks (or two!) with you in your park bag. If you get some dry socks on, even fairly wet sneakers will be less miserable.

If you end up with wet sneakers and don’t have a change of shoes for the next day, you can buy a newspaper in one of the resort shops, ball up a few pages of the newspaper, and stuff them into the shoes. Change the newspaper once it’s too damp to soak in any more water. This will get your shoes dryer faster than just letting them air-dry on their own.

In trip pre-planning, I definitely recommend packing several pairs of extra socks and bringing at least two pairs of shoes you’d be happy to spend a day in.

As far as clothing goes, keep in mind that there are many areas inside WDW where water drainage isn’t great and large puddles can form. Wearing jeans in the rain at WDW is not particularly comfortable in my opinion. There’s something about denim that gets rough and abrasive when it’s soaked with water, and it doesn’t dry very quickly.

If the weather is warm enough (and for about 85% of the year, it is) I recommend shorts or capris if there’s rain on the way. You’re going to splash through some puddles, and your skin will dry faster than just about any fabric.

There are also some athletic-wear fabrics that have quick-dry properties. Fabrics like Coolmax are used in all sorts of styles of shirts, and they dry faster than other fabrics. Consider buying a shirt or two made of this sort of fabric prior to your trip and you’ll have a solid choice if you have a rainy day.

Washcloth or hand towel

Okay, you’re looking at me funny now, aren’t you? Well, on my daughter’s first trip to WDW in May of 2009 (we were not locals yet, and I’d never been at any Disney park in the rain before) we had just about the rainiest trip you can possibly imagine. We had one day where it only rained for about two hours, but it rained almost non-stop every other day of our trip. We pushed through and still had a good time, but there was one thing we did that helped more than anything else.

My daughter was three at the time, and while she’s pretty good at going with the flow, we found out early in that trip that she really didn’t like when her face got wet. A wet face led to a sad little child who couldn’t focus on all the great stuff around her. We kept a washcloth (borrowed from our resort hotel room with a note left for our Mousekeeper explaining why it was missing) in a Ziploc in our park bag and we were always ready to combat the problem.

Someone in your family is going to have some rain-related reaction that can be solved with a dry washcloth. They’re going to hate having wet feet, wet arms, wet face, something. Either that, or something you need to stay dry will get wet, like your smartphone or your child’s autograph book. One dry hand towel in your bag will let you fix it right away instead of running around looking for napkins.

Consider bringing a change of clothes if there’s a high chance of rain

This might be overkill for adults (our clothes are bigger and bulkier to pack) but you might find that having a change of clothes for kids is worth the trouble. Sometimes just having a change of shirt or an extra pair of shorts/underwear can save the day. You can roll up the extra clothing tightly, put them in our old friend the Ziploc bag, and then squeeze out the air when closing the bag to make the clothes take up as little room as possible.

You can buy all kinds of clothing items in park merchandise shops, but if paying theme park prices for clothing you might not have purchased otherwise makes you break out in hives, you’ll want to plan ahead and try to avoid that particular pleasure.

Be alert

Our natural reaction to walking in the rain tends to be a tucked-downward chin. It’s harder to watch where you’re going, harder to see obstacles in your way. I’ve seen people trip over things they would never have missed in the sunshine. People bump and bang into each other simply because it’s hard to see who is where. You’ll be dripped on by someone removing a poncho or putting the edge of their umbrella over your head, just because people are distracted in the rain. People get cranky and make bad choices in the rain. Be careful and pack your patience.

Speaking of making bad choices…

Don’t gum up entrances/exits

One of the most difficult situations that occurs in the parks in the rain is how the entrances and exits gum up with people dealing with their umbrellas or ponchos. I’ve been stuck inside attractions before because of everyone standing around blocking the exit, either trying to wait out the rain or getting out and putting their ponchos on before leaving the building. I’m all for staying dry and keeping as dry as possible under your poncho, but exits just can’t be blocked this way. Get your ponchos out while you’re waiting to exit the ride, take a step or two to the side once outside the ride (many rides have an outdoor overhang) and quickly pull on your ponchos. Don’t wait until you get to the exit to rummage around in your bag, that just gums up the works.

Maybe it’s not a bad time to rest at the hotel

I know, I know. Everyone talks about the lovely short lines at the attractions in the rain. I’ve seen it, I know the lines get short and that people leave the park in droves when the grey clouds come. But you know what? There are times for bravery and persistence, and there are times to retreat and regroup. If your group is already tired and cranky when the rain hits, really think before you forge ahead. You might see twelve attractions during the rain or you might get to ride Space Mountain five times in a row with no wait, but if everyone is cranky and upset with each other, those aren’t going to be good vacation memories. Take a quick survey of the people you’re with if the rain hits and make sure everyone’s on board. Maybe this is a good time for a quick service lunch back at your resort instead.
Posted in Tips | Tagged , , , | Leave a comment

Weird/Offbeat Photo Ops: Aladdin and Jasmine’s “Rainout” Room

Indoor backdrop in the Morocco pavilion shops

Indoor backdrop in the Morocco pavilion shops

In Epcot, Aladdin and Jasmine usually do their meet and greets outside the Morocco pavilion in the World Showcase, by the railing at the edge of the water. However, when there’s inclement weather, there’s a room near the back of the pavilion where the meet and greet is moved to. There’s a neat backdrop there (pictured to the left). It sure is a shame to let the room go to waste when the weather is good and Aladdin and Jasmine meet outside.

Well, it doesn’t have to go to waste. I’ve noticed that the room is usually kept open when it’s not in use. It serves as a good pass-through from the Restaurant Marrakesh into the pavilion shops, so perhaps this is why the doors are usually kept open. If you’re looking for another good backdrop (though, the breathtaking tile work in the main areas of the Morocco pavilion also makes for a good photo background) then stroll back to the room and see if it’s open. This would be an especially great backdrop to use if you have a child dressed up as Jasmine for the day! (Obviously you can’t take a solo picture if Aladdin and Jasmine are meeting there because of bad weather, but you could always queue up for their meet and greet at that point.)

You’ll find the area near the back right (if you are facing toward the pavilion from the main walkway) side of the area, kind of tucked between the shop where the Morocco Kidcot station is and the open area outside the entrance to Restaurant Marrakesh. Here is a photo where you can see the open door leading to the backdrop (middle right) and also the Kidcot station in the background, which will hopefully help you find it:

Doorway to the backdrop area in context inside the Morocco pavilion

Doorway to the backdrop area in context inside the Morocco pavilion

Posted in Epcot, Weird/Offbeat Photo Ops | Tagged , , , , , , | Leave a comment

Magical Moments and Giving Back to Cast Members

Picture this: You’re in one of the Disney parks and a cast member goes out of their way to make your trip a little more magical. Maybe they make a special fuss over your child who is dressed as their favorite character or slip you a special dessert at one of your meals. Perhaps one of your interactions with a character is especially good, something you’ll remember for many years to come, or they give you an extra set of fastpasses at just the right time.

Here’s an example. My family recently had a great time with cast member Nick at Magic Kingdom’s Tortuga Tavern. He was great fun to be around from the second we walked under the tavern’s sign, greeting us like fellow pirates and asking our daughter if she’d ever been asked to walk the plank. He stayed in character the entire time he took our order, and then presented us with an extra cookie to go with our lunch. It sounds simple, but he made quite an impression on us. Pirate Nick was all my daughter could talk about at the table while we ate our nachos. She was so entertained by him that she even forgot about the cookie he gave her for dessert until we reminded her about it. We were already having a good day, but he made it even better.

I hope every guest in a Disney park gets to experience this kind of extra-special customer service at some point during their visit. It’s difficult to explain how happy even a simple above-and-beyond gesture can make you, but whatever overwhelmed, stammered “thank you” I’ve ever been able to choke out in the moment never seems like it’s enough to get across my gratitude. Thankfully, there is a way we can give those cast members a more formal thank you, but to do it, you’re going to have to make sure you remember a few things about your magical moment.

If you experience extraordinary customer service, note the following:

  • The cast member’s name
  • The location
  • The time
  • As many details about why this was special to you as you can remember

If your memory is anywhere near as bad as mine is, make sure to write down, text, or email those details to yourself as soon as you can! After that, all you have to do is visit Guest Services on your way out of the park (or visit the concierge desk at your resort if you are commending a cast member you met at your resort or in a restaurant at the resort) and ask to fill out a guest comment card. Guest Services will help you fill out the card, and then they will file it with that cast member’s supervisor. I have been told that the guest comments are put into their employee file, that they are called out for a special mention at their next team meeting, and that the cast member also receives a copy of your comment to keep. Comments like these can also factor into internal employee evaluations.

If you can’t make it to Guest Services or the resort concierge desk, you might also try submitting your experience at WDW’s guest comment web form. I doubt comments submitted this way will have the same weight as a card filled out at Guest Services, it certainly couldn’t hurt.

Another thing you may want to consider is bringing a few homemade thank you cards with you. Sometimes it’s hard (for kids especially, but for adults as well!) to react quickly with a proper thank you when a cast member does something special for you. If you are prepared with something small you can pull out of your pocket and hand to them, you don’t have to worry about being too flustered to express your gratitude. You don’t have to bring any fancy, store-bought folding thank you cards, though. You can make some simple, quarter page sized postcard type cards very easily before your trip and bring them with you.

Fold a piece of printer paper in half from top to bottom and side to side and write “Thank You” and put some Disney-related doodles or stickers in each of the four quadrants. (You could also use a graphics or word processing program and design this on your computer.) Take that master sheet to a copy store and have it printed on a few pieces of heavier card stock. If you used different colors on your master, you may want to opt for color copies on white card stock. If you used black and white, it could be fun to have your copies on different colored sheets of card stock. After that, simply cut down the center each way and you have little thank you postcards you can hand out whenever the mood strikes you.

And now I’ll wish you good luck in having some pixie dust sprinkled on you during your next trip! Hopefully now you’ll feel prepared to express your gratitude if it happens.

Posted in Crafting for Mickey, Those Wonderful Cast Members, Tips | Tagged , , , , , , , , | 2 Comments

Tips: Last Minute Reservations at WDW Table Service Restaurants

Le Cellier filet with mushroom risotto

Le Cellier filet with mushroom risotto

I’ve mentioned before that it’s possible to have some luck walking up to even some of the more popular WDW restaurants if you show up at “off” times, especially if you ask about openings right as the restaurant is beginning a new phase of seating. (If you browse restaurants on the official WDW website you can see the time ranges for breakfast, lunch, and dinner served at that restaurant.) There’s another way you may be able to secure that hard-to-get reservation for certain locations.

At many WDW restaurants, Disney charges $10 per person for no-shows and for cancellations with less than 24 hours notice. (You must provide a credit card when making reservations at these locations.) This encourages anyone holding a reservation that they won’t end up using to release it back into the system a day or more before the reservation time, and it seems many people are waiting until 24-36 hours before their booked ADR to cancel them.

For example, my husband and I were sitting around last night, making plans to go to Hollywood Studios and Epcot today. As we were talking, we decided to see what kind of dining reservation we could get for lunch/early dinner at Epcot. We looked first at Le Cellier, a place we’ve been looking forward to trying for lunch, but neither of us thought we’d find any availability on such short notice. Well, we had not one, not two, but three choices for different ADR times presented to us. We took the “weirdest” slot, the 2:50 pm choice, so we could spend more time at Hollywood Studios in the morning. However, we also had been given choices of 11:50 am and 1:20 pm, hardly oddball dining windows. Out of curiosity (after grabbing the ADR we wanted, of course) I searched for openings at a few more restaurants on the $10/head cancellation list, and I found several hits that I wouldn’t have expected to find.

Here is the list of restaurants that have the credit card hold/$10 per person cancellation fee. These are the ones you can try within that last 24-36 hours before you want to eat there to see if someone has opened up a slot with their cancellation.

  • 1900 Park Fare
  • Akershus Royal Banquet Hall
  • Artist Point
  • California Grill
  • Cape May Cafe
  • Chef Mickey’s Buffet
  • Citricos
  • The Crystal Palace
  • Flying Fish Cafe
  • The Garden Grill
  • Hollywood and Vine
  • Jiko
  • Le Cellier Steakhouse
  • Narcoossee’s
  • Ohana
  • Tusker House Restaurant
  • Hollywood Brown Derby
  • Victoria and Albert’s (cancellation fee here is actually $25/person)
  • Yachtsman Steakhouse

Additionally, the locations that require full prepayment carry a cancellation fee of the entire pre-paid amount if there is a no-show or if a cancellation is made less than 24 hours before the reservation time. Those locations are:

  • Cinderella’s Royal Table
  • Hoop-Dee-Doo Musical Revue
  • Mickey’s Backyard BBQ
  • Spirit of Aloha Dinner Show

Good luck with all of your last-minute dining reservation attempts! I wish you all as much luck with it as we just had. (Our meal at Le Cellier this afternoon was GREAT!)

Posted in Dining, Tips | Tagged , , , , , , , | Leave a comment

Events: Noticing Special Events and Activities in the Parks

Sign for the Highland Games

Sign for the Highland Games

For fans of Disney Parks, it’s pretty easy to be aware of the big yearly events that take place in the parks, like Star Wars Weekends, the Food and Wine Festival, and the Flower and Garden Festival. There are many smaller events, however, that seem to fly largely under the radar of most visitors, mostly because they don’t get the same level of publicity as the bigger events do.

Recently, we’ve seen Car Masters Weekend at Downtown Disney (first weekend of June, now over), Sundowner Celebration at Animal Kingdom (ongoing as I write this, continuing each evening at least through the end of June), the Amazing Flamingo Race (fun educational event for kids to teach them all about flamingos, also going on now and continuing at least through June), and the Highland Games at Epcot to celebrate the release of Pixar’s Brave (running through early July).

So how can you possibly find out about events like that which may take place during your trip? There are a few things you can look for, both online and inside the parks themselves.

Disney News Blogs

I don’t aim to report on all the current goings-on in the parks, but rather just to give a few tips and observations of mine now that I’m able to spend a lot more time at WDW than I used to. However, there are several excellent websites that report on daily news from the parks. There are lots of them in the links list on the right hand side of my blog if you’re looking for a few new ones to haunt in search of the latest updates and goings on at Walt Disney World. Keep an eye on them, especially when you have an upcoming trip.  Even if there is a small, very temporary event going on, the sites that update frequently with WDW news usually catch things like that and provide lots of detail on where to go and what you’ll see or experience there.

If you use Twitter, try following the Twitter accounts for some of those websites as well. I see a lot of great, up-to-date information about what’s going on around WDW on my Twitter feed.

Watch For Signs

Look for banners like these

Look for banners like these

They might be banners, they might be wooden signs set into the ground, and unfortunately, they might not be very obvious. If you’re open to detours from your plan for the day, read the signs and banners you see as you walk from place to place!

It’s very easy to get tunnel vision, especially when you are heading for a specific place. The parks are often crowded and it takes a bit of focus to walk in such a large group of people who all have their own destinations in mind. Details pass us all by all the time. Do your best to look for the banners and signs that announce special opportunities through the noise and bustle around you.

Look For Temporary-looking Structures

See the tents visible from across the water in Epcot's Future World?

See the tents visible from across the water in Epcot’s Future World?

If you’re walking along in a Disney park and you spy a tent or another structure that doesn’t look like it could possibly hold up permanently to the rain and heat of Florida weather, chances are that something is going on there. It might be for a private event, but it could also be for something like the Highland Games currently going on at Epcot. Detour toward the out of the ordinary things that you see and check it out.

Ask Other Park Guests

Do you see a line forming, but you don’t know of an attraction in that area? Ask someone in the line what they’re waiting for. You might find there’s a character greeting or other fun event coming up there.

Read the Park’s Times Guide

As an official information source provided by the park, you might think I should have listed the Times Guide first, but unfortunately, there is limited space on it and the special and temporary events often don’t make the cut. Sometimes they are able to fit some extra information on them, though, so they’re worth a look.

I wish you all good luck for finding a great special event to participate in the next time you are visiting Walt Disney World. Keep your eyes peeled and you never know what you might find!

Posted in Events, Go Often Enough and You'll See, Tips | Tagged , , , , | 4 Comments

Tips: Preparing Your Kids for their First Trip

There are so many great experiences you can have as a family at Walt Disney World, but for every child you see with a huge grin plastered on their face, you can find another having a difficult moment. It’s a land of highs and lows, of extremes. No trip is ever going to be perfect, but a little work done beforehand can help you maximize the fun and keep the stress and fear to a minimum. I’ll cover two of the biggies: riding rides and meeting characters. Here are some ways to let your child know what to expect.

Preparing your kids for rides

If you take a quick trip around the Disney fan forums on the web, you would get the impression that there are as many opinions about whether you should take your kids on any given ride as there are people. I’m going to tell you what I think, hopefully while avoiding starting any sort of flamewar.

Pre-Trip Preparation

I think that a successful introduction for kids to rides begins long before you enter the park. Obviously, if you’re trying to plan a surprise trip, this is going to be an issue, but if your kids know about the trip in advance, there are lots of things you can do ahead of time to reduce those pangs of anxiety once you get in a line for a ride.

Some of you are going to think, “Wow, you’re saying I shouldn’t leave any of the details out as surprises for my kids.” And you know, if you think your kids might react really poorly to being surprised by some of these details, that’s exactly what I’m saying. You all know your kids, you probably have a good idea of how they’ll react to certain things. Your kids might be scared of the dark, or perhaps the dark doesn’t bother them at all but they don’t like abrupt noises or ghosts, or what have you. You’ll have a pretty good idea what might be issues for your kid that could affect their enjoyment of the vacation.

  1. Watch on-ride videos on YouTube. When we were preparing for our first trip to WDW, my daughter was just past three years old. She was over 40″ tall, so we knew she could ride Big Thunder Mountain Railroad and the other 40″ rides. I put her on my lap and we watched a few on-ride videos and we talked about what it might feel like to be on the ride ourselves. Would it be fun? Scary? Bumpy? I talked about the things we could hear other people doing, like yelling and laughing. We practiced putting our arms in the air when she could see other people on the ride doing that, and she yelled, “Whee!” a bunch of times. When the time came to ride the ride for real, she approached it pretty much the same way, and I still remember her smiling from ear to ear after it was done, just before she begged to go on it again.
  2. For small children, tell them Mickey (or another favorite character, maybe Phineas and Ferb?) built the rides and the scary moments are all just the character joking around. For older kids, talk about the Imagineers who design the rides and how they studied for a long time to make rides that are thrilling but still safe. My daughter watched Mickey Mouse Clubhouse around the time of our first trip, and she knew Mickey wouldn’t have a ride that would hurt her. She knew as long as she obeyed all of his rules (about keeping herself inside the ride vehicles, etc.) she would be just fine. In the middle of that first trip, while we were walking into Haunted Mansion, my husband made a “scared” face at her and she said, “It’s okay, daddy. It’s all just Mickey’s joke.” Now that she’s six, she still often explains to kids we meet in the lines who appear to be anxious about the ride about Mickey and how he would never make a ride that would hurt them.
  3. Buy MP3s of the ride music (there are some available in the Amazon MP3 store, like Haunted Mansion’s Grim, Grinning Ghosts and Pirates of the Caribbean’s Yo Ho, Yo Ho, A Pirate’s Life for Me) and listen to them so the sound of the rides will be familiar.
  4. For rides you can’t find music or on-ride videos for (dark rides like Dinosaur are a good example of this) explain what will happen on the rides, what they’ll see, and how they might feel.
  5. Tell them about how you (or someone else you know, if you haven’t) have ridden the ride before and you knew you were safe while riding it. This is also a good time to talk about the rules on the rides (like keeping your body inside the ride vehicle) and the safety restraints and how they work to keep the riders safe.

During your trip

Okay, so now you’re on your vacation, and here you are, standing outside a ride you feel your kid will like if they can just get over the hump of getting themselves on the ride, or past one part they might find scary. Here’s where our old friend “distract, distract, distract” comes into play.

The most obvious animal from Pirates of the Caribbean

The most obvious animal from Pirates of the Caribbean

  1. Count the animals. On many rides there are some things going on that might be a little scary, but a small distraction will get your kid through that first ride. Once they’ve been on it once, the fear of the unknown is gone and they’ll likely have an easier time of it. If you know there are animals (Pirates of the Caribbean is perfect for this) then have your children count them during the ride.
  2. Similarly, they can watch for things of a certain color. How many yellow things or green things can they find on Haunted Mansion? Maybe that activity is just enough to get them through that first ride, and they’ll discover that the ghosts are just pretend, and are just portrayed as playing tricks and partying anyway.
  3. The strategic redirect. Think your kid would do just fine on The Great Movie Ride, if only they didn’t have to make it through the Aliens scene? Seat them on the far left end of the ride vehicle and have them look off to the side of the car, where there are a bunch of monitors set up with various readouts. If you can get them looking away from the two Aliens that jump out at you, they will likely miss the scares entirely.
One of the monitors on the left side in the Aliens scene

One of the monitors on the left side in the GMR Aliens scene

Meeting characters

Let’s say your kid has watched Disney shows or movies at home on your television. How big do the characters seem to them, do you think? Do they think of Handy Manny as the six inch tall cartoon character they see on the screen? Do you think they’ve even considered how big Sulley from Monster’s Inc. would be in “real life”? Even with the human “face” characters, like the Princesses, a lot of kids find themselves overwhelmed and tongue-tied when they’re faced with their first few character meet and greets.

  1. Give them a real-world person they know as a comparison. I recommend telling your child a few times before you go that the characters are “tall like ____” (someone you know who is tall). My husband is 6’6″, and leading up to our first trip, I told my daughter that some of the characters were “tall like daddy” and she didn’t seem surprised at the size of the largest characters when we got there. I told her that Mickey and Minnie were “about as tall as mommy” (sigh, yeah, I’m pretty short) and she didn’t seem surprised when she met them, either.
  2. Help them think up things to say to the characters, or questions for the characters. Talk about it before your trip, but also talk to them about it in the line while you’re waiting.
  3. Have something for them to do with the character. Autograph books are a classic example. If the child is holding their autograph book, they have a mission in mind once it’s their turn. They’ve probably seen other kids before them go up, get their signature, and then get a little interaction with the character. If they have a similar thing they can do to help break the ice initially, it could really help them feel more comfortable. My daughter had a kiddie camera on one of our early trips and she really liked having the characters pose for her while she took their picture before she went to them for a hug and a conversation. Anything that adds a tiny bit of structure to the event will help.

    Taking pictures of the characters to help break the ice

    Taking pictures of the characters to help break the ice

  4. Go up to the characters with your child if they seem a little hesitant at first. When they see you’re at ease chatting with Donald Duck, maybe they’ll see it’s not so scary.

My last piece of advice for all possible “scary” moments on your vacation? Allow them to opt out if they really seem frightened. Perhaps they will change their mind later. You know your kid, and if you really pay attention to them, you can tell if they’re really uncertain or scared or if they just need a little reassurance. Listen to your gut.

Posted in Tips | Tagged , , , , , , | 4 Comments